deactivate SDM engine in a lens
Some years ago I had to perform a procedure because some lubricant or oil inside a lens had hardened. This forced the camera body to drive the autofocus mechanism rather than relying on the lens's own focusing motor. Since this information can be difficult to find, I have collected the procedure and relevant details here for the benefit of other Pentax users. As always, proceed at your own risk and remember that service-level adjustments may have unintended consequences.
An autofocus system (or AF system for short) uses a sensor, a control system and a micro-motor to focus. The focus-motor may either be in the lens or in the camera body itself. The ultrasonic motor is an electronic autofocus micro-motor used inside lenses and enables them to autofocus. The screw drive autofocus is opposite from ultrasonic motors where the lens is driven by an autofocus motor in the camera body instead of using a micro-motor inside the lens. The link between the body and the lens is very like the link between a screwdriver and a screw. When the focus motor inside the camera is doing the work, it is called screw drive autofocus.
Most of the older AF lenses from Nikkors (Nikon), Minolta, Sony and Pentax use the mechanically screw drive autofocus system. Newer lenses tend to have their own autofocus motors and are driven by the body electrically rather than mechanically. If the micro-motor in the lens have stopped working you have two options; replace it (could be pricy of it is not covered by warranty) or to deactivate the micro-motor and let the focus motor in the camera body do the work.
The technology has been applied to photographic lenses by a variety of companies under different names.
Active AF systems measure distance to the subject independently of the optical system and subsequently adjust the optical system for correct focus while passive AF systems determine correct focus by performing passive analysis of the image that is entering the optical system. The assist light (also known as AF illuminator) "activates" passive autofocus systems in low-light and low-contrast situations in some cameras. The lamp projects visible or IR light onto the subject, which the camera's autofocus system uses to achieve focus. Many cameras that do not have a dedicated autofocus assist lamp instead use their built-in flash, illuminating the subject with stroboscopic bursts of light. In a hybrid autofocus system, focus is achieved by combining two or more methods, such as active and passive methods or phase detection and contrast measurement.
The ultrasonic motor is used to focus on newer cameras from Pentax while screw drive autofocus is commonly used on older cameras. Some lenses from Pentax have the ability to autofocus with the ultrasonic motor or with the motor inside the camera body. Pentax did this because they wanted to autofocus to work on older camera bodys, such as K1000D Super. If the ultrasonic motor in the lens stops working the autofocus stops working on newer cameras but the screw drive focus continues to work on older camera bodys. If the ultrasonic motor stops working you can in other words disable it and let the camera body do the work. When the ultrasonic engine is disabled, the lens tells the camera body that it does not have a build-in ultrasonic motor and that the screw drive autofocusses in the camera body have to be used instead.
I am going to tell you how you can disable the ultrasonic motor on lenses from Pentax (I have two camera houses from Pentax and did this with my K20D) but I imagine the process is similar for other brands. When disabling the ultrasonic motor on Pentax-lenses you can use either Pentax K-7, Pentax K20D, Pentax K10D, Pentax K-m, Pentax K-x or K100D Super. You should at least have a empty memory card before you start. The battery should be fully charged as well. Here is a list of lenses from Pentax in production as of May 2013 and all with SDM in their names have ultrasonic motor.
NOTE: These are unofficial instructions and you follow them on your own risk.You should check which firmware your camera is using. You can do this by pressing the MENU-button as you start the camera. If you need to upgrade you may find firmware on this page (See next two points before upgrading).
Make a file with ie Notepad (that comes with Windows) or Notepadd++ and name it MODSET.XXX,replacing XXX with digits or the letters TXT. This depends on the model of your camera body. Visit this page at pentax-hack.info to determine what you should name the file. On that page you also see which firmware this works with. Put the text [OPEN_DEBUG_MENU] as the first line of the file and save it. Put the file on the root of your memory card and insert it into the camera.
Start the camera in Debug mode. How you do this is described at pentax-hack.info and the procedure is somewhat different for each camera house model. In most cases it is sufficient with the memory card created in the above point. Start the camera pressing and holding the MENU or DELETE-buttons depending on your model. On my K20D I had to leave the flash door open while turning the camera on as well. When in Debug mode you should see the Debug menu. Beware not to change a thing you do not need (once again, all this are made at your own risk).
Use the pad to go to the line LENS ROM CAMERA=>SD. This makes a file on the memory card called LENSEEP.LNS and may be looked upon as a config-file for the lens.
Insert the memory card in your computer and modify the file. IMPORTANT: Make a backup of it before you edit in case something goes wrong. If you want it to use the ultrasonic motor later you can replace the updated LENSEEP.LNS with the one you take backup of.
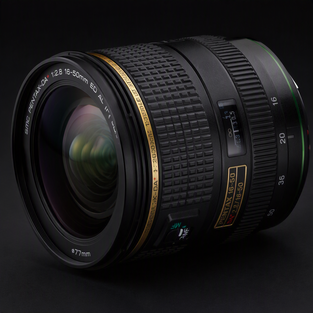
The changes described below are for Pentax DA* 16-50 and 50-135 (at least according to this thread at PentaxForums.com) and may be somewhat different for other lenses. Below is a copy of the LENSEEP.LNS form my DA* 16-50. As you see there are many colons and the values you need to change are the ones marked in red. Replace these red values with "80" (without the quotes) and save the file. Note that you only need to change values on the first page.
Here is what the file should look like. The changed text is marked in red.
Put the modified file LENSEEP.LNS in the root of your memory card and load it using the line under the one you used for saving the file. It should say something like LENS ROM DAT SD => CAMERA but this may vary depending on your camera body.
Start the camera in normal mode and test the lens. It should now use the screw drive autofocus instead of the ultrasonic motor.